Deactivating or Replacing a Tag
Retired a piece of equipment, or a tag got damaged? Deactivate the tag so it stops counting toward your plan. Its history stays on file.
Deactivate a Tag
One tag: Admin > Tag Manager, then on the tag tap Options > Deactivate and confirm.
Several tags: check them in Tag Manager, pick Batch Deactivate under Do the following to checked, and tap Submit.
Anyone who scans a deactivated tag is told it's been deactivated. It stops counting toward your active tags. Because billing uses the highest count since the last rebill, your next rebill doesn't change; the lower count shows up the rebill after that.
Several tags: check them in Tag Manager, pick Batch Deactivate under Do the following to checked, and tap Submit.
Anyone who scans a deactivated tag is told it's been deactivated. It stops counting toward your active tags. Because billing uses the highest count since the last rebill, your next rebill doesn't change; the lower count shows up the rebill after that.
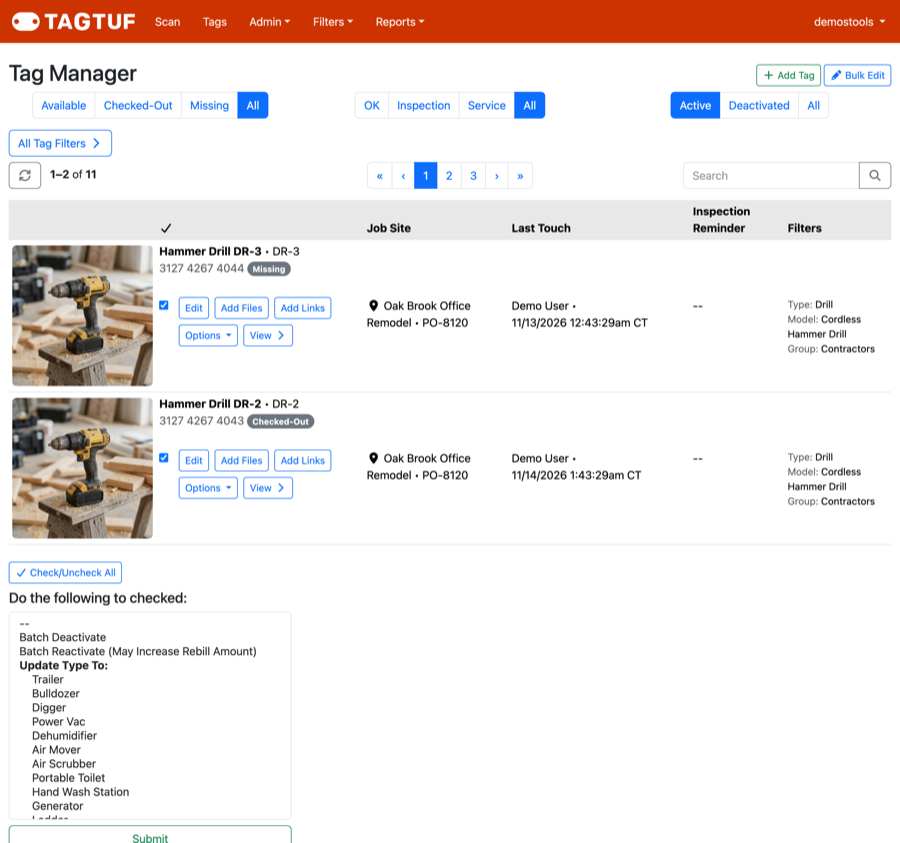
Batch Deactivate in Tag Manager
Bring It Back
Deactivated tags are under Deactivated in Tag Manager. Tap Options > Reactivate (May Increase Rebill Amount) on the tag, or check several and pick Batch Reactivate.
Replace a Damaged Tag
1. If you want a copy of the old tag's history, use Options > Export Tracking Log on it first.
2. Activate the new tag and give it the old tag's name, Custom ID and filters.
3. Deactivate the old tag.
The old tag's history stays with the old tag; it doesn't move to the new one.
2. Activate the new tag and give it the old tag's name, Custom ID and filters.
3. Deactivate the old tag.
The old tag's history stays with the old tag; it doesn't move to the new one.
Clearing a Tag's History
Options > Delete All Log Entries removes every entry on a tag, for example before reusing it on different equipment. This can't be undone, so export the history first if you might need it.
Comments
No Comments Yet