Scheduled Client Emails and the Final Report
Send your client the job site report on a schedule while the job runs, and a final report with equipment days and the full history when it's done.
Set Up Scheduled Emails
1. Go to Admin > Job Sites, tap Edit, and turn on sharing under Client Reports.
2. Enter up to three Client Emails.
3. Under Email The Report, pick Send: Daily, Weekly or Monthly, then the day (On or Day) and the time (At).
4. Tap Save.
Under the schedule you'll see when the next one goes out and when the last one was sent. Every report goes to all the client emails on the site.
2. Enter up to three Client Emails.
3. Under Email The Report, pick Send: Daily, Weekly or Monthly, then the day (On or Day) and the time (At).
4. Tap Save.
Under the schedule you'll see when the next one goes out and when the last one was sent. Every report goes to all the client emails on the site.
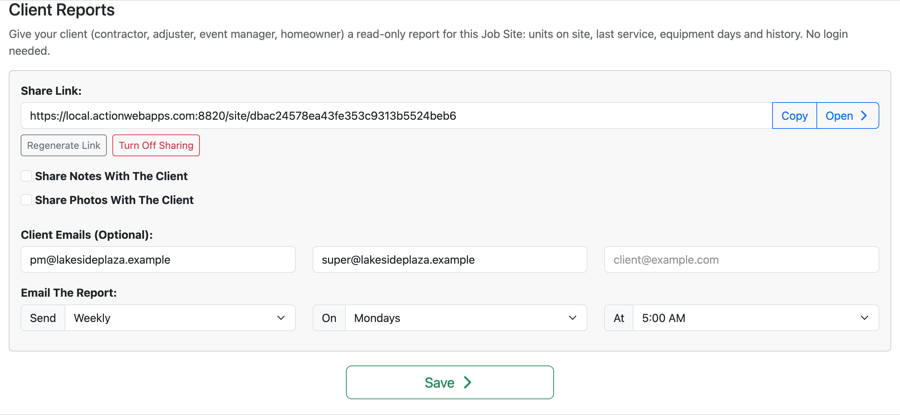
Two client emails and a weekly report on Mondays
Send the Final Report
The final report has the equipment days and the full history for the job site. It's only sent when you send it, never automatically, so you can fix anything first and send it again after a correction.
When you close a job site that has client emails, TagTuf offers a Send Final Report button right there. You can also send it any time from the Job Sites list: Options > Send Final Report.
When you close a job site that has client emails, TagTuf offers a Send Final Report button right there. You can also send it any time from the Job Sites list: Options > Send Final Report.
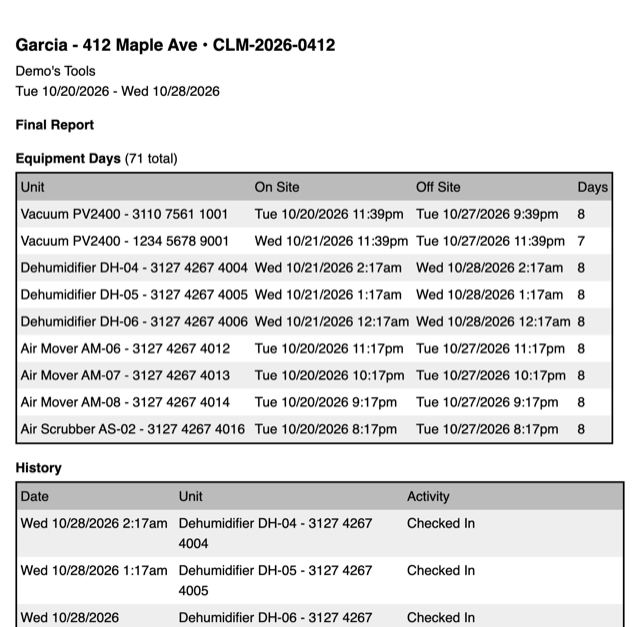
A final report email
Stopping the Emails
Closing a job site stops its scheduled emails, and reopening it starts them again. Setting Send to Never or turning off sharing stops them too. Each email has an unsubscribe link, so a client can stop getting that site's reports.
Comments
No Comments Yet