Tag Manager: Changing Many Tags at Once
Tag Manager is where Full Access users set tags up: edit one tag, or check a set of tags and change them all at once.
Open Tag Manager
Go to Admin > Tag Manager. It has the same buttons and filters as the Tags list, plus Active, Deactivated and All, and a button row on each tag.
One Tag
Edit: name, description, Custom ID, its own custom QR code link, an inspection reminder, and its filters. Each section saves on its own.
Add Files and Add Links: photos, manuals and links for this tag.
Options: Export Tracking Log (its history as a CSV file), Deactivate, and Delete All Log Entries.
View: opens the tag's page.
Add Files and Add Links: photos, manuals and links for this tag.
Options: Export Tracking Log (its history as a CSV file), Deactivate, and Delete All Log Entries.
View: opens the tag's page.
Many Tags at Once
1. Use the filters to narrow the list.
2. Check the tags you want, or tap Check/Uncheck All.
3. Under Do the following to checked, pick what to do: Update Type To (or Model, Status, Team, Zone, Group), Check Out To a job site, Check Out (No Job Site), Check In (Available), Batch Deactivate or Batch Reactivate.
4. Tap Submit.
Check-outs and check-ins made here are saved in each tag's history under your name, just like a scan.
2. Check the tags you want, or tap Check/Uncheck All.
3. Under Do the following to checked, pick what to do: Update Type To (or Model, Status, Team, Zone, Group), Check Out To a job site, Check Out (No Job Site), Check In (Available), Batch Deactivate or Batch Reactivate.
4. Tap Submit.
Check-outs and check-ins made here are saved in each tag's history under your name, just like a scan.
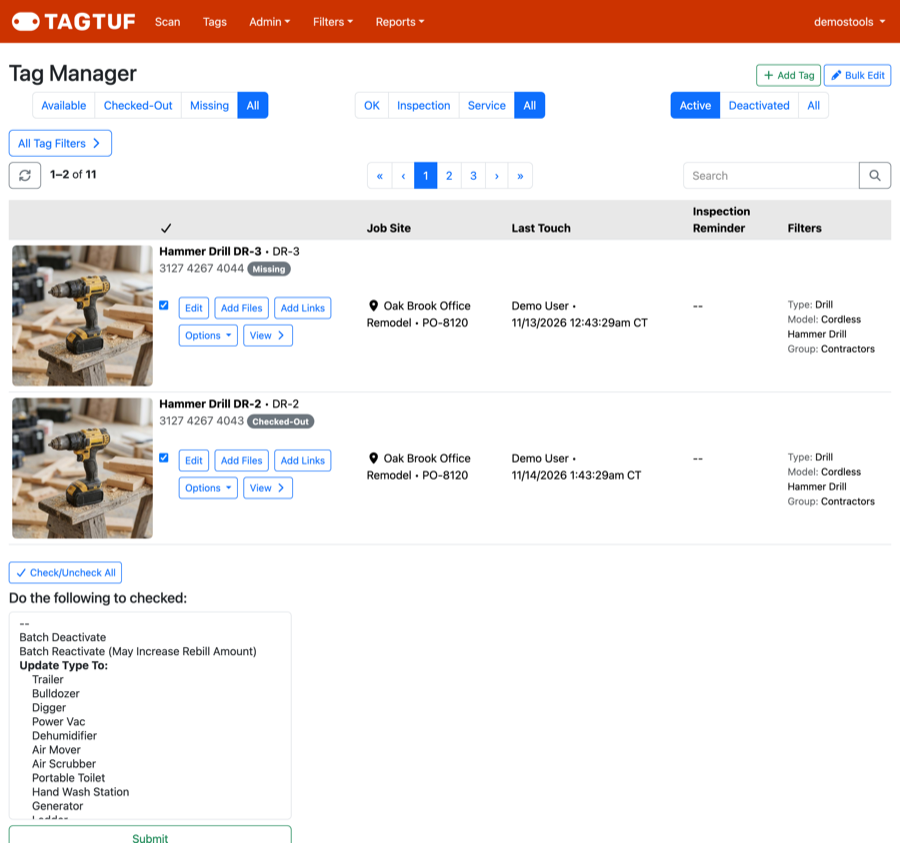
Check tags, then choose what to do to them
Names and Custom IDs in a Spreadsheet
Bulk Edit (top right) lets you edit tag names, Custom IDs, descriptions and custom QR code links in Excel or another spreadsheet:
1. Tap Export CSV File and open it.
2. Change the values and save it as .csv.
3. Choose the file under Import CSV File and import it.
Only those four columns are imported.
1. Tap Export CSV File and open it.
2. Change the values and save it as .csv.
3. Choose the file under Import CSV File and import it.
Only those four columns are imported.
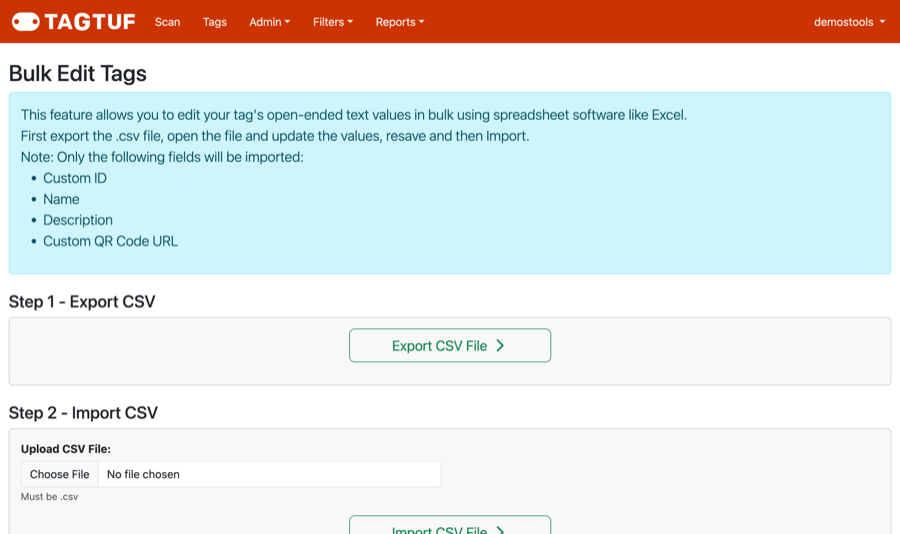
Bulk Edit: export, change in a spreadsheet, import
Comments
No Comments Yet